Tesla Scratch Repair: 7 Steps You Should Follow!
Last updated on September 12th, 2023 at 03:03 am
If you own a Tesla, you know it’s a great car with an impressive exterior; but accidents happen, and scratches can occur.
You don’t want this scratch to mar the beautiful exterior of your car, and the repair cost isn’t relatively cheap.
Fortunately, repairing those scratches is easier than you might think, even if you have yet to gain any prior experience with auto body work.
So how do you go about repairing the scratch on your Tesla?
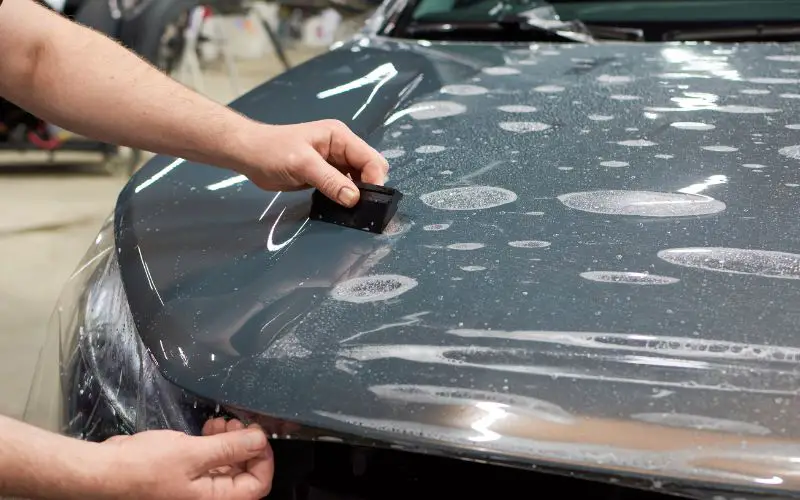
Firstly, assess the vehicle to determine the severity of the scratch by running your fingers through it to know if it’s a minor scratch or more. Also, prepare your repair materials, like the microfiber cloth, degreaser, painter’s tape, clay bar, and polisher compound. Then follow the instructions to apply the materials to your Tesla scratched area.
In this article, I’ll walk you through the step-by-step process of repairing your Tesla scratch and how much it costs. I’ll then explain how to fix your Tesla for a deep scratch.
By the end, you’ll know if the scratch is something you can fix yourself and save money while getting a smooth finish for your Tesla.
Seven Steps to Repair Scratches on Tesla?
If your Tesla has suffered from scratches and scuffs, don’t panic. Fortunately, you can quickly repair many minor scratches by following these seven simple steps.
#1. Assess the Damage
Firstly, before this repair, you should assess the damage to know if it is a minor or deep scratch.
That way, you know if it’s what you can fix yourself or need the help of a professional.
Check the damage by running your fingers through the scratched surface of your Tesla.
This method won’t repair if the scratch is deep enough to peel the paint and expose the metal.
However, if it is a light scratch, not deep enough to expose the metal, then this fix should do for it.
#2. Clean the Area
Now that you know the damage is a minor scratch, you can fix it. Start by thoroughly cleaning the area around the scratch with soap and water.
Rinse and dry it thoroughly before proceeding to the next step. You can wash your vehicle or pressure wash it; the most important thing is to clean the area.
Then clean your vehicle with wax and a grease removal wiper.
#3. Sanding
This process isn’t compulsory, so you can skip it unless your Tesla scratch is deep, as sanding helps level the scratch on it.
Use fine-grit sandpaper for surface scratches and gently sand the affected area. Wet your sandpaper and use it on the scratch in a circular motion until it smoothens.
Be careful not to apply too much pressure as it may damage the paint further.
#4. Buffing
Next, apply a small amount of rubbing compound onto a clean cloth and gently buff the area in a circular motion until the scratch is no longer visible.
Use a microfiber cloth to remove any remaining residue.
#5. Tape the Affected Area
To do a clean job, use painter’s tape to restrict the scratched area to focus on it, and your work won’t affect the other part. So whatever work you do will be in the taped area.
#6. Priming
Apply primer to the affected area, so your paint will stick. Prime about 2-3 times; wait about 5-10 minutes between each application for it to dry.
#7. Apply Coat
Apply a base coat to the affected area about 2-3 times and wait 5-10 minutes for it to dry. Next, apply the clear coat and repeat the process of applying the base coat.
Wait for like 24 hours before proceeding to the next step.
#8. Polishing
Finally, use a car polish to protect and shine the newly repaired surface. Apply a small amount of the polish onto a clean cloth and rub it on the surface until you coat it evenly.
Allow it to dry briefly before buffing it off with a microfiber cloth. You can apply wax to give it a glossy finish, then allow it to dry before wiping the area with a microfiber cloth.
It is important to note that these steps are suitable for minor surface scratches. It is best to seek professional help from a Tesla-certified technician for deep or more extensive scratches.
By following these simple steps, you can save considerable money by repairing minor scratches on your Tesla. Always remember to handle your Tesla with care to avoid future damage.
Can You Fix Tesla Scratches Yourself?
The answer is: it depends on the severity of the scratch. You can easily buff surface-level scratches with a microfiber cloth and a scratch remover.
However, deeper scratches may require more extensive repairs.
If you’re comfortable with DIY repairs and have experience working with car finishes, you can handle some minor scratch repairs on your Tesla.
For deep scratches or extensive damage, it’s best to seek professional help to ensure they repair the vehicle correctly and you do not further damage its finish.
The table below shows the pros and cons of fixing your Tesla scratches yourself.
| Pros | Cons |
|---|---|
| It is cheaper to repair the scratch yourself. | If you doubt your skills, there’s a high chance of damaging the vehicle more. |
| You can fix it at your desired time and not wait for a scheduled time. | Repairing the scratches yourself may void your warranty. |
| You can have your vehicle looking fine quickly and not move around with scratches. | Repairing yourself may take more time than with a professional. |
| You’re sure you can do it yourself again without spending much. | Lack of professional tools to fix the scratch properly. |
Before attempting any repairs, research and use high-quality products compatible with Tesla’s finish. Also, be cautious to avoid creating new scratches while attempting to repair old ones.
While fixing minor scratches on your Tesla yourself may be possible, it’s always best to seek professional help for more severe damage.
It may cost more upfront, but it’s worth it to ensure the longevity and appearance of your vehicle.
Does Tesla Repair Surfaces and Minor Scratches?
Yes, Tesla does offer surface and minor scratch repairs. You can reach out to Tesla Service Centers to help fix the scratch.
These repairs usually involve a simple touch-up paint job or buffing out the surface scratches.
If the scratch is too deep or the damage is extensive, it may require more advanced repair work and to be taken to a professional Tesla repair shop.
Tesla has partnered with auto body shops to help with this repair. With these Tesla-approved auto body shops, you’ll surely get the best service for your vehicle based on your location.
However, Tesla offers touch-up paint repair kits for small surfaces and minor scratches that you can use at home to fix the problem.
It’s always best to consult a Tesla representative or professional mechanic to ensure they use the correct repair method for your scratch.
How Much Does It Cost to Fix Scratches on Tesla?
The cost of fixing scratches on a Tesla varies depending on the severity of the damage. If such happens, budget about $50 -$2500 or more for the repair work.
You can typically fix minor surface scratches through DIY methods or with the help of a professional detailer, which may cost around $50 to $150.
However, if the scratches are deep and require repainting, the cost can range from $150 to $2500.
It’s important to note that these prices are estimates and can vary depending on the location, severity of damage, and type of repair required.
Additionally, some insurance policies may cover scratch repairs, so it’s worth checking with your provider to see if you’re eligible for coverage.
Ultimately, the cost of repairing scratches on your Tesla depends on the extent of the damage and the method of repair you choose.
How Do You Fix Deep Scratches on Tesla?
Deep scratches on your Tesla can be more challenging than surface-level scratches. However, fixing them with patience and the right tools is still possible.
Here are the steps to fix deep scratches on your Tesla:
#1. Clean the Area
Use a microfiber cloth and some mild soap to clean the scratched area. Before proceeding to the next step, ensure no dirt or debris remains on the surface.
#2. Sand the Area
Gently sand the scratched area using fine-grit sandpaper. That will help remove rough edges around the scratch and smooth the area.
#3. Apply Wax and Remove Grease
Apply the removal to remove the dust from the sanding and make the surface clean and ready for primer.
#4. Apply Primer
Apply about 2-3 layers of primer to the scratched area of the vehicle; sand in between applications. Make sure you’re comfortable while doing this.
#5. Apply Paint
Apply about three coats of paint; for the base coat, mid-coat, and clear coat, depending on how it looks after each application.
#6. Let the Paint Dry
Allow the paint to dry for at least 24 hours. If the scratch is deep, apply more than one coat of paint. Wait for each coat to dry completely before applying the next one.
#7. Sand and Polish
Sand the touch-up paint down to the level of the surrounding paint. Refrain from sanding too much, as this could remove the touch-up paint. Then, use some polishing compound to buff the surface until it shines like new.
Following these steps, you can fix deep scratches on your Tesla and make it look as good as new.
If you are still determining your abilities, it’s always best to take your Tesla to a professional body shop for repair.

Hey, I’m Michael Davis, a 35-year-old with a degree and a love for cars and tech. Since I was a kid, cars have been my thing—so much that I even thought they ran on magic beans! Fast forward, and I’ve built Vehicle Army, your one-stop-shop for easy-to-understand car facts.