Tesla Dashcam Unavailable (3 Possible Reasons With Solution)
Last updated on April 18th, 2023 at 11:16 pm
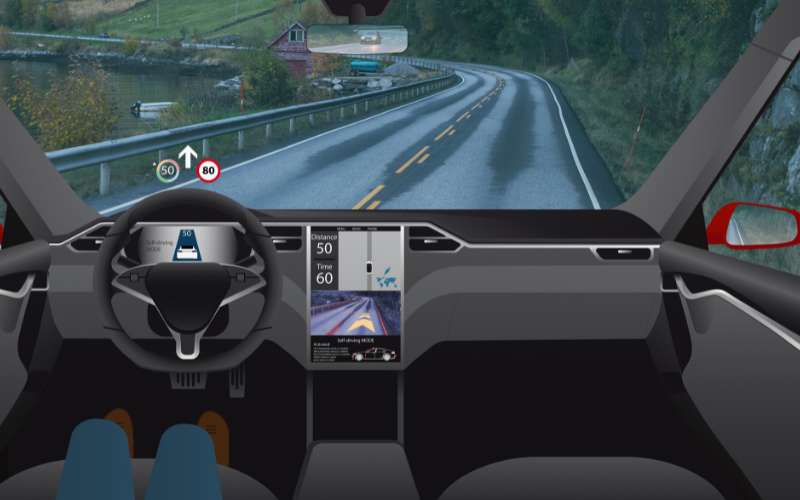
Tesla is well-known for its clever innovations in cars enabling drivers to navigate the road safely, and one of them is a dashcam.
These dashcams record events from the car windscreen, offering several advantages.
However, recently, many have complained of their Tesla dashcam having bug issues which end up showing ‘Tesla Dashcam Unavailable.’
So, it’s only natural to wonder how to go about this problem and what caused it.
In most cases, it’s always the USB issue or insufficient space. Fortunately, it doesn’t require a lot to fix most time. A simple formatting, system reboot, or USB unplugging will return it to normal. However, many still have reported these solutions being temporary, so Tesla has commented on working to find a lasting solution soon through a software update.
In this article, I will run you through every necessary information you need on tesla Dashcams. Especially on why your dashcam may be unavailable.
Why Is Dashcam Unavailable on Tesla?
Your Tela dashcam is showing unavailable for different reasons.
And this issue has amassed great reports, even reaching Tesla, who promises a new software update as a solution. Here are some factors behind this problem.
It’ll help you know what to avoid doing and how to navigate this issue.
#1. Wrong USB Type
USB memory sticks come in different versions, either 2.0 or 3.0 and above, and the difference in versions equals differences in performance.
Generally, version 2.0 might be working fine, but at some point, it may need help to keep up and meet the requirements. Hence, this results in the unavailability of the dashcam.
#2. Insufficient Space
Your Tesla dashcam works to record all events from your car’s windscreen.
But with time, these recordings might consume space until there’s none left. And when there’s no more space for new files, the dashcam’s unavailable to work.
#3. Incorrect Format Setting
Dashcams have a correct standard file system which is FAT32.
If you recently got a Tesla dashcam and it shows unavailable, it could be that its setting is inaccurate or needs another formatting.
Tesla customers and all drivers who use dashcams recognize its importance hence why they get worried when it gets faulty.
But aside from these benefits, it could also pose some other disadvantages. And below, we’ve put together some advantages and disadvantages of Tesla dashcams.
| Advantages | Disadvantages |
|---|---|
| Enhanced protection | It could distract drivers from the road |
| The GPS feature in dashcams helps offer security | Some states, like Massachusetts, have banned the use of dashcams |
| It prevents fraudulent insurance claims. | Dashcams’ video quality isn’t always top-notch |
| It is a great way to improve driving skills for beginners. | Dashcams can be a pricy investment. |
How Do I Get My Tesla Dashcam to Work?
The good news amid these Tesla dashcam problems is that you can get them to work again. But remember that some solutions work better than others.
Whatever the case, below are some ways to fix your Tesla dashcam.
#1. Get a New USB
USB issue takes the lead regarding the causes of dashcam unavailability. Therefore, replacing your old USB memory stick with a new one will be proper.
For example, if you’ve been using a 2.0 version, you need an upgrade because you need faster performance and more data storage.
Therefore, buying a 3.0 USB memory stick version and above is advisable. Another crucial thing to note is to stop unplugging your USB after use.
Always leave it plugged in, as constantly removing it increases the risk of corrupting files and needing another reformatting.
#2. Increase Space on the Dashcam’s USB
Running out of space is expected if you’ve used your Tesla dashcam for some time now. Hence, ensure to clear your storage often.
To do this, remove the dashcam USB and connect it to your laptop/PC and pick some old files to remove. It’s recommended to delete recordings under the SavedCmore previous files.
Also, don’t forget to delete FSCK files, or they’ll take up more space. FSCK files result from finding corrupted files originating from recordings done before the car shuts down.
When they run such files and recover them, it usually goes to your USB drive root. So check this section often and get rid of them periodically.
When you remove the USB drive or shut the car down, the last file that Tesla Dashcam actively records is always corrupted and unusable.
#3. Increase Tesla Dashcam Partition
If you have two partitions in your USB for Tesla dashcam recorded files and music, try to increase your dashcam partition and shrink the other music partition.
You can always consider this option if deleting dashcam files doesn’t work.
#4. Format TeslaCam USB to FAT32
FAT32 is a standard file system; new dashcams usually don’t have this as default.
Hence, endeavor to check them and confirm if formatting is needed:
- Connect the USB to your laptop and open your file to confirm this.
- Right-click the USB and click on the properties option to see its file system.
- Even though this file might be in the correct setting, another formatting is still needed.
How Do I Format a USB Drive to Enable Dashcam Tesla?
Formatting your Tesla USB drive to enable the dashcam is the best way to solve the unavailability issue, and you can do this in two ways.
The first method involves running it automatically. And the second way means using a third-party option.
This third-party option seems recommendable as many Tesla users have reported that the automatic method does not yield wanted results.
#1. Automatic Formatting
The automatic formatting involves using the Tesla to format USB with its in-built tool.
It means formatting the USB drive as an exFAT and erasing existing files to back up all recordings.
- Connect your USB drive to the Tesla.
- Go to the Control menu, click safety, and select the security option.
- Scroll down to this menu, and search for the format USB drive option.
- Click on the format button and begin the process.
#2. Manual Format
A manual format uses a computer and a third-party such as Minitool partition wizard or EaseUs partition manager free.
- Connect the USB drive to your laptop and download any third-party tool listed above.
- Right-click on the USB drive you want to format and select the format option.
- Choose a new partition title and file system from the left category and select OK.
- Open the file system, choose the correct standard formatting system, FAT32, backup data, and select OK to continue.
- Select the option to execute tasks, then apply changes to begin the formatting.
After this, return the USB drive to the front USB port and wait a few seconds for the Tesla to recognize the drive.
Then, activate the dashcam and Sentry Mode buttons from the Controls, and you’re all set.
Does Dashcam Drain Tesla Battery?
Your Tesla dashcam runs only when Sentry Mode is activated. And during this period, your battery loses energy even when the car is inactive.
Compared to other vehicles, Teslas are never off. Some features are always activated, such as cameras and sensors working to protect you from theft.
But the disadvantage is that they suck your battery life while at it.
Fortunately, Tesla provides a 20% fail-safe option, meaning the battery continues draining and losing power until it gets to 20% and then stops.

Hey, I’m Michael Davis, a 35-year-old with a degree and a love for cars and tech. Since I was a kid, cars have been my thing—so much that I even thought they ran on magic beans! Fast forward, and I’ve built Vehicle Army, your one-stop-shop for easy-to-understand car facts.