5 Reasons For Tesla Charging Interrupted! (Easy Solutions)
Last updated on April 18th, 2023 at 11:17 pm
There’s nothing more annoying than a Tesla that randomly stops charging.
Having to wake up to a flat or barely charged vehicle that you think has been changing through the night can be enough to drive one insane.
You may be wondering where these issues stem from. So, in this article, we’ll examine the reasons for these interruptions and possible fixes.
Your Tesla may get interrupted every time you schedule a charge for several reasons, including a damaged vehicle battery, a corroded charging port, you turned on your battery charger limiter, a glitching Tesla, and a burned-out chip.
So, without further ado, here is an extensive description of these Electric Vehicle (EV) issues and possible fixes.
By the end of this article, you’ll be able to tackle these issues and go back to using your Tesla in no time.
Why Tesla Charging Gets Interrupted With?
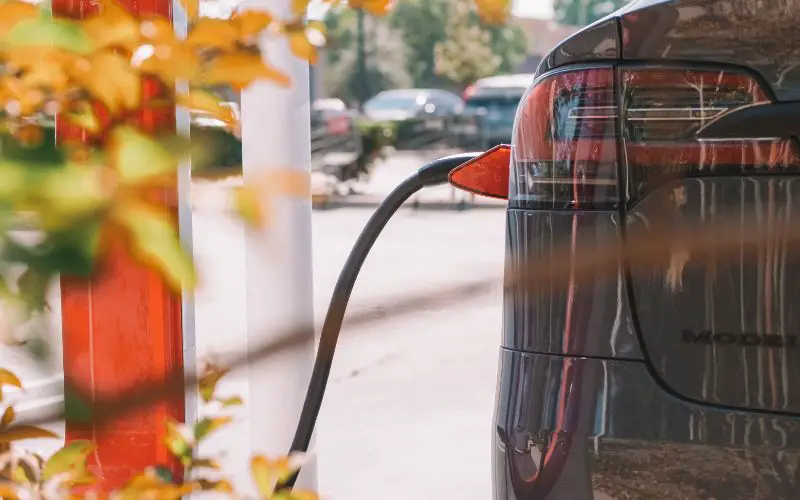
Below are various reasons your Tesla vehicle may randomly stop or get interrupted while charging.
#1. Damaged Vehicle Battery
A damaged battery interfering with your car’s charging is a likely reason your Tesla stops charging.
The battery your Tesla operates on helps your car charger with charging. However, if your battery isn’t in good shape, it will likely not accept this charging.
Unfortunately, a damaged battery isn’t the only thing you’ll face if you find yourself in this situation.
How fast and far you can drive, glitches and the overall performance of your Tesla are just some other issues that come with a damaged car battery.
#2. Corroded Charge Port
A corroded port is another thing that may cross your mind after noticing these interruptions with your Tesla.
Luckily, you can examine your charge port to see if it’s actually under any damage.
You can do this by carefully looking at your charger for white spots in or around the charge port.
These white spots indicate corrosion. For example, your Tesla charger may become corroded when you don’t use your Tesla vehicle for a long time.
Once this happens, charging is sure to be interrupted. However, it might continue charging but break down randomly through the night, leaving you with a half-charged vehicle.
Also, check your charge cable for any signs of corrosion on the plug because you may start to experience the same problem if that’s the case.
#3. Battery Charger Limiter
Overcharging your battery could be killing your Tesla battery. It might seem strange, but it does happen.
Your battery doesn’t like being overheated or charged too much. So it’s always best to keep your charge between 25% and 75%.
It’s one of the essential means of maintaining your electric battery.
Charging your Tesla up to 100% daily will weaken the battery’s life, which may result in the following:
- Tesla takes more extended periods to charge.
- A charge has fewer miles.
- Poor performance of your Tesla vehicle.
To fix this, you can turn on the electric limiter of your Tesla to protect your battery. Your battery will stop charging once it hits 75% (the ideal maximum it should charge).
Although you can’t fix this setting on your Tesla, you can still add one if you own a smart EV charger.
#4. Tesla Undergoing a Glitch
A common glitch prevents your Tesla from charging up to its total capacity. In addition, it stops your Tesla from charging when it gets close to 100%.
For example, your Tesla may charge to something like 95-99% and then suddenly stop accepting any more charges.
#5. Burned-Out Chip
Your Tesla has numerous chips scattered in various locations of your vehicle. And one of these chips is responsible for permitting your car to accept an incoming charge.
The flash storage chip is embedded in the MultiMediaCard, also known as eMMC.
This chip is responsible for charging your Tesla and will burn out if you overwork it.
And this will be chaotic for your car as it will suddenly stop charging or not permit the vehicle’s charge.
Unfortunately, this isn’t an issue you can fix by yourself. However, since this is a prevalent issue with Tesla vehicles, the good news is that you can immediately contact a tech service at Tesla.
We know how irritating and challenging these issues can be. Below is a list of fixes for your Tesla’s charging issues:
#1. Contact Support
The first thing you should do after noticing an issue with your Tesla vehicle (especially one concerning the charging port) is to contact Tesla’s Technical Support.
Often, the issue could be an electrical or software issue with your Tesla vehicle that’s interrupting your car’s charging process.
So, if this is the case, there’s nothing left for you to do but reach out to a Tesla tech to fix it.
Although you might be discouraged from contacting them over the phone (for fear of lousy customer reception).
It would be best if you didn’t worry, as they’re accommodating and will provide all your assistance. You can always contact Tesla on their hotline: 1-888-518-3752.
However, if you can’t fix the issue over the phone, you’ll have to take your car to a Tesla shop for a support visit. They’ll assist you with this arrangement.
#2. Examine the Charger
Also, be sure to check your Tesla charger for possible damage to it.
Carefully examine it for any signs of corrosion, or damage (to the port, chip, etc.), then check that the connector’s green light is on before plugging it in.
You might have needed clarification on what the different lights on your EV connector signify, and we’re here to help.
Here’s a table containing the different lights on your connector and what they signify.
| Lights on Charge Port | Meaning |
|---|---|
| White or light blue | The charge port door is open and ready to charge. |
| Blue | You plugged in the connector. |
| Flickering blue | You scheduled a charge session, and the car is ready to charge. |
| Flickering green | There’s charging progress. |
| Flickering amber | EV charging at a slow pace. |
| Solid green | Charging completed. |
| Solid amber | You still need to insert the connector fully. |
| Red | Charging has stopped due to a detected fault. |
When you’re confident that the issue isn’t from your charger, you can be sure it’s from your car.
Similarly, if you’re charging at a public location and notice any damage on the public charger, contact the number pasted on the charger.
If you’re having this issue with your Tesla charger in a new home, it’s always best to verify that your electrician installed everything well.
Nevertheless, this shouldn’t be of much concern if a professional electrician installed it.
However, accidents are bound to happen, so it would help to determine the condition of your charger before plugging it in.
#3. Hit Reset
There’s a secret reset button on your Tesla, which can be very helpful if you’re stuck in this situation. However, before hitting the reset button, you should put your Tesla in “Park” mode.
And then, follow the guide below to achieve a successful reset;
- Enter your Tesla vehicle and hold down the brake pedal.
- Press and hold on to the buttons above the wheel and the scroll wheel simultaneously.
- Be sure to keep everything pushed in till you notice the screen go black before it turns back on.
However, for Tesla Model 3 owners, resetting is a bit different but a lot easier. All you have to do is:
Head to Control after closing all your car doors, Hit Safety and Security, and then switch the power off.
You’ll have to wait at least five minutes after this (try not to touch anything while you wait).
After five minutes, open your doors and check if your car has started charging.
Why Does My Tesla Stop Charging After a Few Minutes?
As stated earlier, a faulty charger is one common reason your Tesla may stop charging.
For instance, if you plug in your charger on a damaged outlet, there’s no way your Tesla’s going to get a complete charge.
Also, there might be too much drain on the particular drain of the circuit you plugged your EV into.
In such a case, it would be best to look around to see what else you connected to the circuit.
Also, for various reasons, it could be that you forgot to plug in your connector.
Or it was disconnected by some other person who probably needed the outlet and so took out your charger.
Or, someone accidentally pulled the cable and detached it from the outlet. The good news is that you can easily connect it if this is the case.
However, if it isn’t, you’ll have to trace the root of the problem carefully. But, of course, that is if there’s enough power going through the outlet.
A power outage is also likely why your Tesla randomly stops charging. In addition to a damaged circuit board, electricity overload, or issues with a fuse.
Fortunately, you can fix all these problems with the assistance of a certified electrician. Nevertheless, you can contact Tesla support for help if the issue is from your Tesla.
Is It Normal For Tesla Charging to Get Interrupted?
Charging interruptions on your Tesla vehicle may seem ordinary, but they’re certainly not. And there are various reasons these interruptions may occur.
They are;
- Glitches in your Tesla vehicle.
- Power glitches to your home.
- A high voltage in the charging outlet.
- You programmed the connector to an excessively charging current.
- The wall connector wire is too short.
- A loose connection in your electrical circuit.
- Irregular ground faults of your charging outlets/circuits.
Suppose you discover any of the above issues are responsible for the interruptions.
In that case, you should carefully watch for the voltage your mobile app reports immediately after charging starts.
Afterward, your charging current may increase rapidly in various stages before reaching your programmed charging voltage. Always be sure to check these voltage figures.
For instance, if your final reported current surpasses a 6V drop from the initial voltage, you may have an issue with your charging circuit.
Likewise, with a faulty mobile connector, try removing and then fixing back the head of the connector. That should fix half of the charging interruption error.
And for the other half, you’ll have to turn off the circuit breaker, remove the outlet from the wall and verify that there aren’t any faults with the wiring.
Also, it’s always best to check if your plug is tight enough. You can check this by plugging and unplugging the adapter and ensuring the plug is tight enough.
If anything appears burned, replace the outlet. And try trimming out any burned or melted wires.

Hey, I’m Michael Davis, a 35-year-old with a degree and a love for cars and tech. Since I was a kid, cars have been my thing—so much that I even thought they ran on magic beans! Fast forward, and I’ve built Vehicle Army, your one-stop-shop for easy-to-understand car facts.


