Tesla LCD Screen Leak: Things You Should Know!
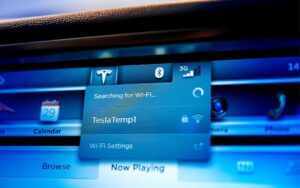
Tesla’s media control unit (MCU) came as an innovative feature for drivers. It added a touch of class to the already efficient driving system.
But one problem to quickly plague the system was leaks from the LCD screen. That showed that the system wasn’t free from the errors other screen manufacturers faced.
The leaking LCD screens weren’t a result of poor production as it first seemed. It was more of the screens performing in conditions dissimilar to the testing environment.
One of the primary reasons for the leaks from Tesla’s LCD screen was the heat. Although the screens passed industrial testing, extreme weather conditions take a toll on them. So, the screen leaks surface in areas of high temperature. That’s because the vehicle will have an overload of heat, simultaneously dealing with external and internal heat.
Does that mean heat is the only reason for Tesla LCD screen leaks or bubbles? Well, you’ll find out by reading through this article.
This article will reveal what causes leaks on Tesla LCD screens and how to fix the problem. Read on to learn how to get your LCD screen bubble-free!
Why Does My Tesla Screen Have Bubbles and Leaks Gel?
A Tesla LCD screen with bubbles is most likely due to exposure to high temperatures causing overheating. It’s vital to know that gadgets have temperature limits.
As such, your Tesla vehicle is no exception, and sometimes, even the slightest negligence may prove costly.
The fact that Tesla motors are electric means that exposing them to extreme temperatures is a no-no. For starters, batteries become less efficient in that state.
Thus, keeping your vehicle away from extreme heat or cold is best. Moderation, in this case, is best! Now, the same goes for your LCD screen.
Although it’s not a battery, it’s still a fragile component. You’ll notice batteries discharge faster when they overheat. So, you can liken that to your Tesla’s LCD screen.
Screens comprise fluids, so it is easy to see that they may become unstable at high temperatures. So you’ll start to see air bubbles around your screen.
That’s because very high temperatures are likely to trigger fluids to vaporize. Hence, the result is air bubbles.
Gel leaks usually occur when the seal holding the fluid in place breaks. Then it can escape and get to places it shouldn’t be.
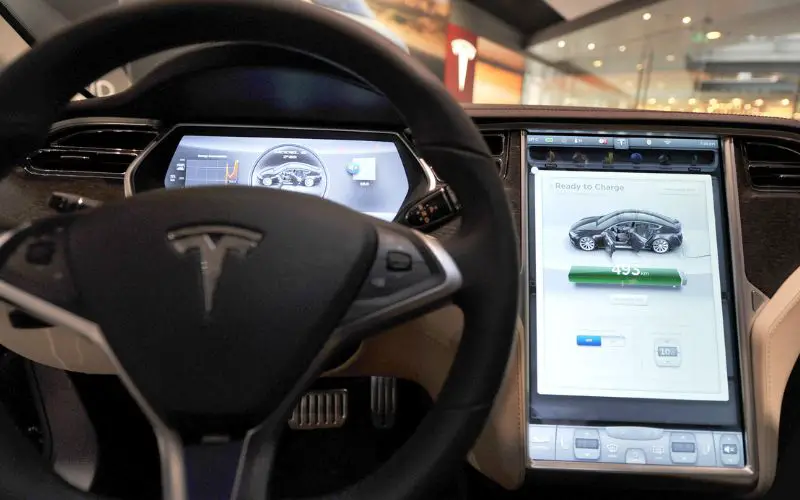
The gel sits between the LCD screen and the front glass (protective cover) to enhance the viewing angle. However, that was only the case in the MCU1 system.
Here’s a table showing the generations of Tesla MCUs.
| MCU Type | Production Period | Display Fluid |
|---|---|---|
| MCU0 | Until December 2015 | Yes. |
| MCU1 | December 2015 to March 2018. | Yes. |
| MCU2 | March 2018 to 2021. | No. |
| MCUZ | From June 2021 (Model S and X; Model 3 and Y). | No. |
Tesla improved their technology when designing the MCU2. The LCD screen in the upgrade system is free of the gel that the MCU1 screen had.
Thus, you’re safe from gel leaks from the LCD screen when you have an MCU2 upgrade or a higher version.
Although the gel is a clear fluid, it can ruin your clothes and other fabrics when it touches them. That’s because it’s sticky and hard to remove when it stains.
Operating your Tesla LCD screen becomes tricky when it leaks gel or air bubbles block the display. It’s always best to get the situation under control as soon as possible.
The leaks or air bubbles usually start on a small scale and worsen when left unattended. So do well to swing into action once you see signs of either problem.
Now you know why your Tesla LCD screen has air bubbles or leaks gel. We also have you covered on how to fix the problem.
Will a Hard Reset Clear the Bubbles on My LCD Screen?
No! A hard reset of your Tesla’s media control unit will not affect the air bubbles on your LCD screen.
The reason is simple; the fault is due to a hardware error, not a software malfunction. Thus, you’ll need a hardware solution.
Although in some cases, the bubbles may not be an issue even when they remain on the screen.
That’s the case when the bubbles form on the edge of the screen and don’t invade the screen view. So you can carry on with your screen the way it is.
But getting a screen replacement is the only solution when the bubbles obscure the screen view. Although it tends to be pricey, it offers the best and most permanent fix.
However, consider another option if you need more time to get ready for the expense of an MCU upgrade. What may work is extracting the bubbles using a syringe.
It may sound like something out of a backyard lab, but it works! Although you’ll have to (fittingly) employ surgical precision to complete the task.
For this task, you need a needle longer than 0.75 inches and not more than 0.3 mm in diameter. You’ll find it hard to fit a needle with a larger diameter.
Indeed, not everyone will have needles and syringes lying around. So you can head down to your neighborhood pharmacy or get this needle set and syringes.
When your syringe and needle are set, please follow the steps below to extract the bubbles from the screen.
- Disassemble the screen: you should note the order of the parts before you take them off. Otherwise, the setup won’t work after you reassemble it.
- Slide the needle gently through the space between the instrument cluster and the main screen to reach the bubble.
- Gently pull the syringe plunger to suck the air out of the bubble. You’ll notice the bubble start to shrink after a few seconds.
- Repeat the previous step until you take care of all the bubbles. Although some bubbles may become hard to reach and hide in the corners.
- You can use longer needles to reach those bubbles until you need a longer needle than what you have. Regardless, your work there is done.
- Now, reassemble the screen, and you’re good to go.
However, reach Tesla’s support service for a screen replacement if you cannot clear the bubbles yourself.
How to Fix a Leaking LCD Screen on Tesla?
The solution to a leaking LCD screen on Tesla is to replace the seal on your displays. So, the first quest is to find a way to restore the seal.
Replacing the seal is usually a delicate task, so getting a screen replacement is usually the only solution. It’s also the best solution, but the price is often another problem.
The MCU upgrade now costs $1,750 or $2,250 (depending on whether your vehicle has Autopilot Computer).
As we said earlier, only MCU1 LCD screens suffer this fate. Higher generations are free of the gel between the instrument cluster and the main screen.
So, when you get the MCU2 upgrade (or higher), you can say bye to the gel leaking on your Tesla LCD screen. That’s a refined touch to any Tesla Model S or X built before March 2018.
Sealing the leak with epoxy is an excellent solution for the DIY option. If you’re looking for a good product, J-B Weld Pro works nicely.
Next, scan along the plasma seam to find the air leak. The region of the air leak usually looks softer than other areas of the seam.
There may be multiple areas where air leaks along the seam. So do well to double-check. After finding the leaks, apply the epoxy to seal the plasma seam.
Your LCD screen should now be safe from leaks after applying the epoxy. However, assess the screen afterward to see if further action is necessary.
Did Tesla Recall Models With LCD Screen Leak?
No! Tesla didn’t recall car models with LCD screen leaks. However, Tesla recalled some Model S and Model X vehicles for MCU faults.
The reason was for eMMC failure rather than LCD screen leaks. Regardless, Telsa owners could enjoy free repair services if their vehicles were still in the warranty period.
That was a long shot for most Model S and X owners because their vehicles were well out of the warranty period.
Naturally, a massive outcry followed to move Tesla to initiate a recall, but nothing changed.
Despite the pleas, Tesla maintained servicing leaking LCD screens for only vehicles within the warranty period.
Eventually, the coming of MCU2 and higher generations phased out LCD screen leaks. But those upgrades came with their headaches as well.

Hey, I’m Michael Davis, a 35-year-old with a degree and a love for cars and tech. Since I was a kid, cars have been my thing—so much that I even thought they ran on magic beans! Fast forward, and I’ve built Vehicle Army, your one-stop-shop for easy-to-understand car facts.